
 Pin it
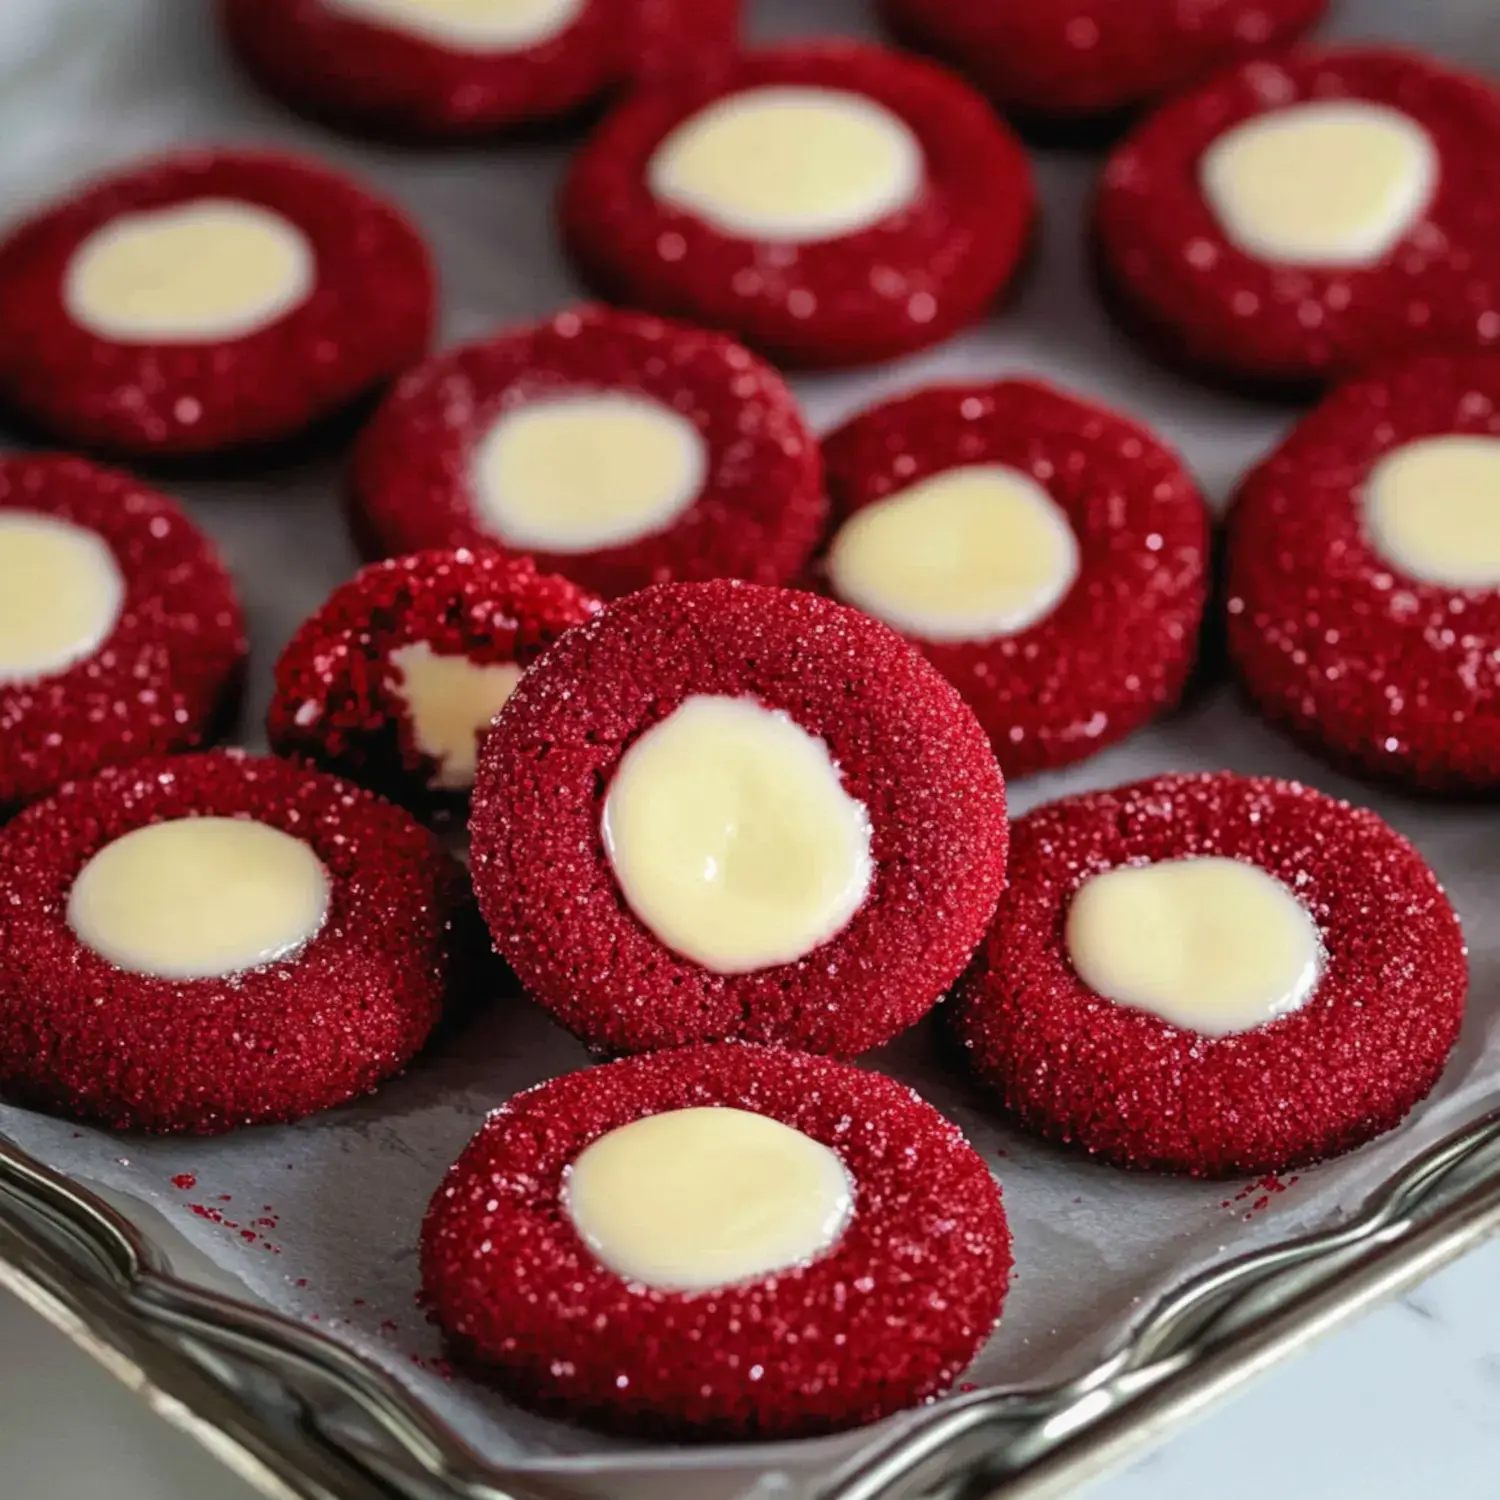
Man, I can't wait to let you in on these Crimson Velvet Cheese-Filled Cookies! They've become what everyone begs me for during holiday season, and there's a good reason why. Imagine this: stunning ruby-colored, tender cookies with an incredible cheese center hiding inside. My kitchen turns into what feels like a premium bakery whenever I whip these up, and they vanish quicker than I can mention 'holiday cookie swap!' Take my word for it, after one taste, you'll make these your holiday favorite too.
The Magic Behind These Irresistible Cookies
You know when you serve something and everyone just lights up? That's what happens with these cookies! The crimson base has this subtle chocolate flavor that works so well with the zingy cheese center. I first baked them for our family Christmas gatherings, but nowadays people ask for them all year long. My daughter took some to school last Valentine's Day, and would you believe her teacher texted me wanting to know how to make them!
Everything You'll Need
- Flour: Any standard all-purpose flour will do just watch your measurements!
- Cocoa Powder: Don't skimp here premium powder really shows in the flavor.
- Salt: A tiny bit brings all the tastes together.
- Butter: Set it out ahead so it softens completely.
- Brown Sugar: My trick for keeping cookies wonderfully soft.
- Egg: Let it come to room temp with your butter.
- Vanilla: Pure extract makes all the difference here.
- Cream Cheese: Go for full-fat only it makes the filling so much creamier.
- White Sugar: We'll use this for our cheese center.
- Sour Cream: My personal twist for extra zing!
- Red Food Coloring: Try to find the gel type.
- Sanding Sugar: Not required, but adds such pretty sparkle for holidays!
Steps to Cookie Perfection
- Start With The Center
- Begin by making the cheese filling as it needs to get cold and firm. Mix everything until totally smooth. I always taste a bit at this stage gotta make sure it's right!
- Cookie Foundation Work
- Combine your dry stuff first so you won't get any cocoa lumps! Then beat your butter and sugar until it gets airy and light. You want it looking like little soft clouds.
- Color Transformation
- Now comes the exciting part when you add red coloring! This is when my kids always want to help. Blend until you get that gorgeous red shade, but don't mix too much or your cookies won't stay soft.
- Form With Care
- Make dough balls roughly ping pong ball sized. I love rolling mine in sparkly sugar for that festive look! Push a small dent in each for the cheese filling to sit in.
- Two-Stage Baking
- You'll need to bake these twice first to set the cookie shape, then again with the filling added. Your house will smell incredible!
Tricks I've Learned
After countless batches of these, I've picked up some handy tricks! Try to find gel food coloring since the regular liquid kind can make your dough too wet. Always use super soft cream cheese or you'll end up with little lumps. And here's my number one tip: take your time when mixing the butter and sugar. Those few extra minutes of beating will totally transform your cookies!
Storage Secrets
Since they've got that cheese filling, these cookies need to go in the fridge. I keep mine in a special cookie box with paper between the layers. They'll stay good for about 4 days if they last that long in your house! Want to prep ahead? You can freeze them too just let them thaw slowly in your fridge overnight.
Great for Celebrations
These cookies practically shout party time! Their bright red color looks amazing on any holiday spread. I always bring them to Christmas cookie exchanges and everyone wants to know how to make them. For Valentine's Day, I sometimes shape them into little hearts so adorable!
Answers to Your Questions
People always ask me stuff about these cookies! Yes, you can make the dough ahead just wrap it up tight in the fridge. Can you skip the cheese filling? I guess so, but honestly that's what makes them special! Wondering about food coloring options? Definitely go with gel I figured this out after ending up with several batches that turned out pink!
Try These Variations
I love playing around with the basic recipe sometimes. Throwing mini chocolate chips into the dough? So good! Last December, I used green sugar on some for a Christmas feel. One time I mixed some Nutella into the cheese filling and wow, it was absolutely incredible!
Ways to Enjoy
These treats just beg to be eaten with a big glass of cold milk! I love putting them out during holiday get-togethers next to some warm cocoa they always disappear first. They make such wonderful gifts too just pack them in a cute box and you'll totally make someone smile!
What Makes Them Crowd Favorites
There's something truly magical about putting crimson velvet and cream cheese together they just work perfectly in a cookie! These treats have such a nice balance of flavors, they look absolutely stunning, and they bring that special holiday feeling. Whenever I bake a batch, they bring smiles to everyone who tries them. And isn't that what we're all trying to do when we bake during the holidays?
 Pin it
Frequently Asked Questions
- → Why chill the filling ahead of time?
- It firms up the mixture, making it simpler to handle and keeps it intact while the cookies bake.
- → Can I prep these cookies early?
- Sure, they'll keep at room temperature for 2-3 days or in the fridge for up to 5 days. If storing longer, refrigerate because of the filling.
- → Why use gel food colors instead of liquid?
- Gel colors give bolder color without extra liquid, which could change the texture. Less gel is also needed to get perfect results.
- → Can I freeze baked cookies?
- Frozen dough works better than freezing fully baked cookies. The creamy filling can get a rough texture once it’s thawed.
- → Why press the cookies twice as they bake?
- The first press shapes the spot for filling. Pressing again halfway through makes sure it stays deep enough for the creamy center.