
 Pin it
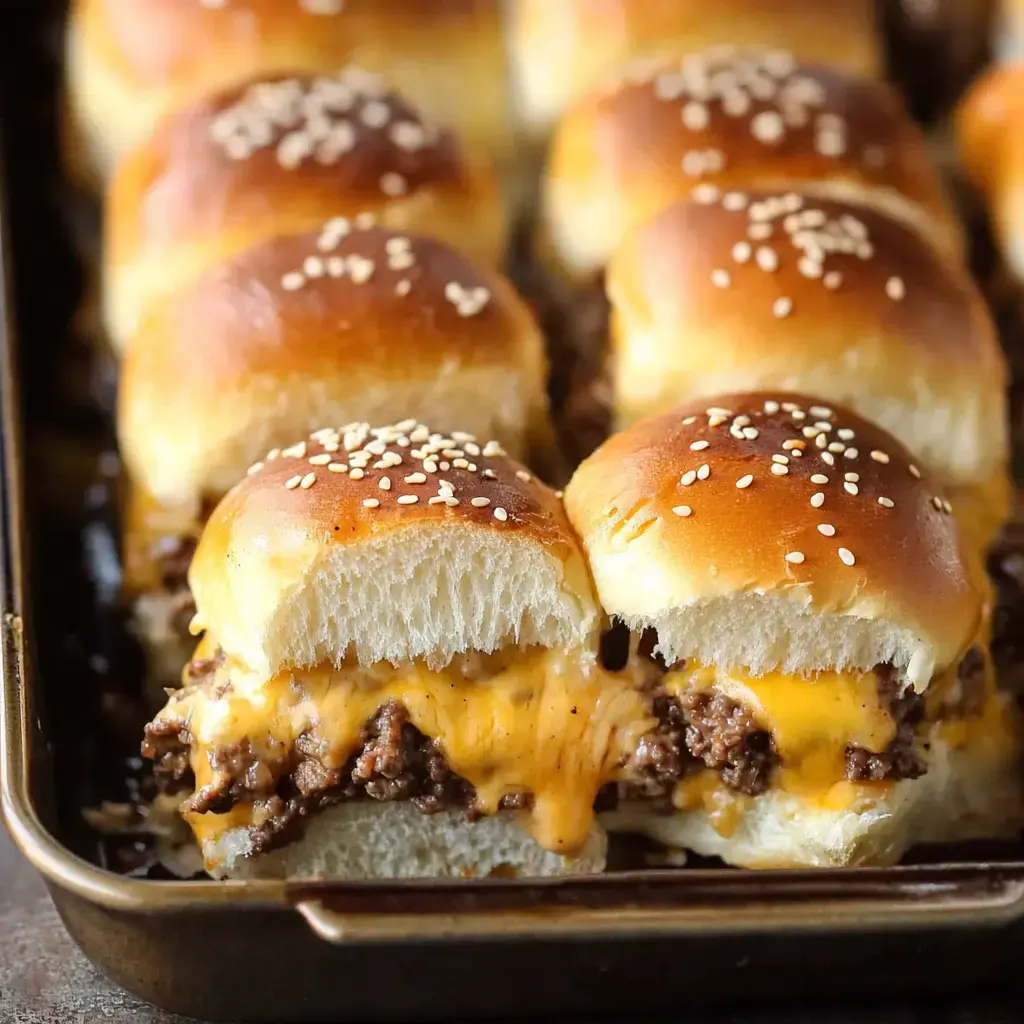
These Mini Burger Bites have turned into my go-to solution when I need to feed a bunch of hungry people. Through many sports gatherings and family meetups, I've tweaked this dish to perfection. There's something magic about combining tender beef, gooey cheese, and those pillowy, slightly sweet Hawaiian buns that folks just can't resist. And the best thing? They're incredibly easy to whip up, even when life gets hectic.
What Makes These Special
The real charm of these sliders is how flexible they are. I can adjust them for the fussiest kids or jazz them up for grown-up gatherings. Their tiny size works great for small hands, and they're perfect for creating a fun make-your-own burger station where guests can pile on whatever extras they fancy.
Ingredients You'll Want
- Ground Beef: Juicy lean beef creates the tasty, moist base.
- Hawaiian Rolls: These tender, lightly sweetened buns complement the hearty filling wonderfully.
- Cheese: Try blending American, provolone, or Monterey Jack for different flavors.
- Caramelized Onions: Not required but adds wonderful sweetness.
- Sesame Butter Mixture: This tasty topping takes your sliders to another level.
Step-by-Step Guide
- Cook the Beef
- Add spices to your ground beef and flatten into a wide, uniform patty in your baking dish. Cook at 350°F until done.
- Cook the Onions
- Slowly brown onions in a pan until they're sweet and golden, then put aside to top some or all sliders.
- Put Them Together
- Stack cheese, beef, and onions between your Hawaiian rolls. Brush the sesame butter mix on the top buns.
- Heat Through
- Wrap in foil and warm in the oven for 10-15 minutes until cheese gets all melty and buns warm up. Enjoy right away!
Customization Ideas
I'm always trying new toppings. Sometimes I throw on some crunchy bacon or dill pickles. My little ones go crazy when I use beer cheese spread. You might want to try ground chicken instead of beef, or get adventurous with odd but tasty additions like a smear of peanut butter.
Storage Suggestions
These little guys stay good in your fridge for around 4 days if you wrap them up tight in aluminum foil. When hunger strikes, just warm them at 350°F for 15-20 minutes. I usually make a double batch and freeze them separately. They're so handy for busy nights.
Tasty Sidekicks
We usually pair these with golden french fries or crunchy sweet potato chips. My children absolutely love tater tots on the side. For balance, I might add a green salad, or when we want to go all out, some cheesy loaded mac and cheese.
Fresh Variations
When we need a change, I'll craft spicy buffalo chicken versions or use ground turkey for something lighter. Adding browned mushrooms and crumbly blue cheese gives them a fancy touch. There's always a new twist to try.
Great For Any Occasion
From simple family meals to big celebrations, these tiny burgers always hit the spot. They work perfectly as quick bites or can make up a full meal. And since they're so simple to put together, I can actually hang out with my guests instead of being trapped in the kitchen.
Pro Pointers
Always spread your beef mixture evenly for proper cooking. I swear by cheese I've grated myself as it melts way better than pre-shredded stuff. Don't skip that buttery sesame topping, it adds tons of flavor. And make sure you serve them straight from the oven while everything's still warm and melty.
 Pin it
Frequently Asked Questions
- → Why cook the beef layer whole?
- Making one big patty keeps the cooking even and speeds up assembling. It also locks in the juices better than making separate patties.
- → Do I really need the sesame glaze?
- Not at all! The glaze just keeps the buns flavorful and moist. You could use foil instead if you're worried about over-baking the tops.
- → Can I prep these ahead of time?
- Definitely! Keep them in the fridge for up to 4 days or freeze for a few months. Reheat before serving so they're fresh.
- → Why should I drain the cooked beef?
- Getting rid of extra grease keeps the buns from turning soggy and gives the sliders a better texture overall.
- → Do I have to stick to the suggested cheese?
- Not really! You can use whatever melting cheese you like, cutting it down to slider size to fit perfectly.